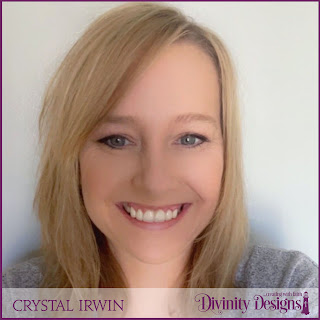
Friday, January 27, 2012

Flashback Friday Favorites - The Bird & Nest Bundle!

Happy Friday, everyone!!! While many of you "snow-birds" are flying out to California for CHA this week, we're celebrating here with some birds of our own! How about a little "Flashback Friday Favorites" this time around on the gorgeous sets from the "Bird and Nest Bundle"?! I can't believe it has been two years since these sets were first released and they continue to "fly" off the shelf at ODBD! (Okay, I warned you before that I'm not great with puns!!)

Not only are the sets still extremely popular, but two of them so far have custom matching cutting dies.....check out the Sparrow Die and the Chickadee die....both of these dies were custom made to cut out the images in a matter of minutes, instead of hours! Believe me, I've cut them all by hand and it takes a very long time to do it right!


Below are some Design Team samples which really show off these sets. Since there are many samples here, they were loaded a bit smaller to save space. Feel free to click on any photo for a close up view. Enjoy!


I don't know about you, but these gorgeous samples make me want to head to my room and start stamping!!! :) If you would like to see more samples with these sets or any other stamps from ODBD, please visit the ODBD Card Gallery.

If you'd like to create your own work of art, check out the Bird & Nest Bundle on the ODBD Stamp Sets page.....by purchasing all four sets at once, you will save 10% from the regular price! While you're there, don't forget to add the custom bird dies to your cart!!

Thanks so much for stopping by today! Stay tuned for another fun Shining the Light Challenge first thing Saturday morning! Have a very blessed weekend!!


Blog Writer

Thursday, January 26, 2012

Time With.....Angie!

Hello friends! 
I hope you have been enjoying a wonderful week and are ready to spend some time with our super talented and ever so sweet Design Team member, Angie!  Angie is going to show you how she colors beautiful scenes with sponge daubers and ink for a spectacular result!!!  Enjoy!!!

Hi everyone! Today I'd like to share a fun scene created with the combination of two sets from Our Daily Bread designs. Since I write a lot of the posts here on the ODBD blog, many of you probably know that my favorite adjective when it comes to ODBD stamps is VERSATILE! I love how you can combine sets to create any scene or any theme you like. Today I am using a brand new set, scheduled for the February 1 release, called 'The Mighty Sea" along with the very first ODBD set, "Light of the World".....what a perfect combination!!

I practiced on scratch paper first to figure out the size of cardstock I needed to cut. Since I am using a 6x8 wooden photo frame, I cut the white cardstock to 4-3/4 x 6-1/2, so that it will have a nice size mat around the scene.

The ocean scene from "The Mighty Sea" was first stamped on the right bottom edge of the cardstock. I use Stazon ink since it is waterproof. I will be coloring with sponge daubers, so I need an ink that won't smear. (If you prefer Copic markers for coloring, do not use Stazon ink, but Memento ink or something similar.)


To stamp the Lighthouse from "Light of the World" in just the right place, I will be using my Stamp-a-ma-jig Stamp Positioner. Place the clear plastic sheet in the corner of the Stamp-a-ma-jig handle....make sure it fits squarely in the corner.


Next ink up your stamp and use the corner of the handle as a guide for your stamp block....stamp onto the clear sheet.


Now that my lighthouse image is on the plastic sheet, I'm ready to line it up onto my ocean scene.


Place the plastic sheet over your cardstock and line up the image exactly where you want it to be.


When it's lined up, hold the sheet in place with one hand and line up the Stamp-a-ma-jig handle with the corner of the plastic sheet with the other hand. Carefully remove the image sheet without moving the handle. If the cardstock moves at this point, you may have to use some temporary adhesive on the back of your cardstock to keep it from moving, then reposition the Stamp-a-ma-jig again. (Remember.....paying attention to the little things makes all the difference in how your project turns out!)


Once your Stamp-a-ma-jig handle is in place, ink up your stamp again, hold the handle in place, and stamp the image again, this time onto your cardstock.


Voila.....now the beach scene has a lighthouse! Now it's time to add some finishing touches before coloring.


Using a portion of the beach stamp, some extra sea-grass was added to the scene, plus a scripture verse from "The Mighty Sea" set.


Since I love to color my scenes with sponge daubers and ink pads, I use 3M Post it Craft Paper to create masks for my images. The photo below shows both stamps on the Post It paper, which I will cut out.


The Post it masks were cut out and placed over the items which need to be protected from the sponging of the skyline. I love to use Post It paper since it clings tight to the cardstock and doesn't move during the sponging process, plus it peels off just like a post it note when you're finished!


At the horizon line I used a Ruby Red color, sponging heavily at the edge of the post it paper and blending toward the top.


The lighthouse light was sponged in yellow, then the rest of the sky was sponged with Marigold Morning, blending down into the Ruby Red. When sponging a scene like this, it's important that your sponge daubers are new and still smooth so that you can get a smooth blended look with the ink....otherwise, the color will not be even. The same goes for when you are stenciling your die cuts.


Once the sky was finished, the masks were removed, leaving the areas which will be colored with markers. A bit more sponging was used for the beach edges, but masking was not necessary for this work.


After the coloring was finished, a white mat and blue background were added, along with paper piercing, silver brads, baker's twine wrapped around linen thread, and a corduroy button.


Supplies used:
Stamps: Our Daily Bread designs 'Light of the World' and 'The Mighty Sea' (available 2/01/12);
Cardstock: SU Brocade Blue and Whisper White;
Ink: Stazon Jet Black, SU Ink Pads and markers;
Accessories: Sponge Daubers, 3m Post-it Craft Paper, silver brads, SU Linen Thread and Corduroy Button, Baker's Twine, paper piercer and template, White Signo Gel Pen (waves), Stamp-a-ma-jig Stamp Positioner, 6 x 8 Frame.

Thank you so much Angie!  Your scene is just over the top!!! Thanks for the step by step how tos!!!  This is also a great sneak peek at what's coming on Feb. 1!  Be sure to stop by for our release blog hop and see lots of inspiration with these beautiful new sets!


Please stop by Angie's blog and leave her some love!  We all enjoy knowing you've stopped by and been inspired!!!  I hope you'll give this a try.... Our Daily Bread designs has LOTS of stamps that make beautiful scenes, so think of the gift possibilities here! Please be sure to add your photos to our Card Gallery, found in the top left side bar of the Store!  You never know when you might be our next featured stamper!!! 

See you on the hop!


Wednesday, January 25, 2012

Customer Card of the Day - Linda aka morningsun47!

Yay! It's Wednesday again.....time to reveal the next ODBD Customer Card of the Day! This week's pick belongs to Linda aka morningsun47....congrats, Linda!! I fell in love with this card the moment I saw it....so clever, creative, and cute!!! I love how she carried the sewing theme throughout, from the Spool & Tape single stamp which was cut out with the Spool & Tape Custom Cutting Die, the sentiment from the "Weave in Faith" set, the seam binding and pins, and the Tim Holtz embossing folder is the perfect background. Way to create, Linda!!!

I know you all are loving this card too! To see more of Linda's beautiful work, please visit her Splitcoast gallery, morningsun47.......you will be inspired for sure!!!

Thanks for stopping by today! God bless!!


Blog Writer

Tuesday, January 24, 2012

Week 4 {ODBDLYLS13} Scrapbook Challenge

Wow, we have some fun entries already this month using our January challenge! Are you planning to join in the fun? You have one more week to get those pages entered! We are so excited to see what you create! If you missed the January challenge, your challenge for January is to: create a layout of any size and any theme using ODBD stamps and this photo as inspiration. Use any or all of the colors. Feel free to add basic colors such as brown, black, or white, and have fun with it!


Challenge Inspiration
Today Lisa is sharing her inspiration using this challenge. I love how she used the colors in the photo to create a military-themed layout. I have seen some other entries this month using a military theme. The colors certainly work perfectly for it! Lisa combined three ODBD stamp sets so beautifully on her page. Be sure to look at her ODBD products list below and visit her blog to find out what family members are in the photos! Such beautiful choices for a gorgeous page!

6" x 6"  Page by Lisa
ODBD Products Used: 
Honeycomb Background, Not Forgotten, Old Flag Background, Bo Bunny Liberty Pattern Paper

To see more information, close-up photos, and a complete supply list, please see Lisa's post here. You can also click on her name just above the scrapbook page. Now, it is your turn to play! Here are the guidelines:

**You must use ODBD stamps on a scrapbook page of any size!
**Other stamps are allowed, but ODBD images need to be the focus!
**Use Keywords ODBDLYLS13 and ODBD when linking to SCS or other public galleries.
**The same keywords will be used for this entire month of January!
**To be eligible for the $15 gift certificate, leave a link to your creation here using Inlinkz.
**All entries for the entire month must be linked to this first post of the month using Inlinkz.
**If you use either your blog link or online gallery, please give a link back to this challenge page.

The challenge runs through Tuesday, January 31st, at 6 p.m. Eastern. You can enter as many times as you like, just remember to link your creations to this first post. We will select a winner from ALL of the January scrapbook challenge entries for a $15 gift certificate to the ODBD Store! The winner will be announced with our new challenge that will begin Tuesday, February 7th! We can't wait to more pages coming in! Blessings,
Scrapbook Team Coordinator